
Who Are the Targets of Whaling Phishing Attacks?
In today’s digital landscape, phishing attacks have become a common threat to businesses of all sizes. Among the various types of phishing, whaling attacks are particularly dangerous due to their focus on high-ranking individuals within organizations. These sophisticated cyberattacks are designed to deceive executives and senior staff into revealing sensitive information or performing unauthorized actions. In this blog, we’ll dive into who the primary targets of whaling phishing attacks are and why they are targeted.
What is a Whaling Phishing Attack?
Whaling phishing attacks, also known as executive phishing or CEO fraud, are targeted cyberattacks that aim to exploit the authority and access of high-level executives. Unlike general phishing attacks that cast a wide net, whaling attacks are meticulously crafted to appear as legitimate communications from trusted sources. The attackers typically focus on tricking top executives into disclosing confidential information, authorizing large financial transactions, or compromising their organization’s security.
Who Are the Primary Targets of Whaling Phishing Attacks?
1. CEOs (Chief Executive Officers)
CEOs are prime targets for whaling attacks due to their influence and access to sensitive company data. Cybercriminals often impersonate trusted contacts or stakeholders to convince CEOs to transfer large sums of money or share confidential information.
2. CFOs (Chief Financial Officers)
CFOs manage a company’s financial operations, making them attractive targets for attackers seeking access to funds or financial records. Whaling attacks on CFOs often involve fraudulent wire transfer requests or unauthorized access to financial data.
3. COOs (Chief Operating Officers)
COOs oversee the daily operations of a company, giving them access to critical operational data. Attackers may target COOs to gain insights into business processes or to disrupt the organization’s operations.
4. CIOs (Chief Information Officers) and CISOs (Chief Information Security Officers)
CIOs and CISOs are responsible for an organization’s IT infrastructure and cybersecurity. By targeting these individuals, attackers aim to infiltrate secure systems, networks, and databases, potentially leading to severe data breaches.
5. Senior Managers and Directors
Senior managers and directors often have control over valuable company data and oversee key projects. They are targeted for their ability to authorize significant actions and access critical information.
6. Board Members
Board members possess insider knowledge and significant influence within the organization. Cybercriminals target them to exploit their authority and access strategic company information.
7. Human Resources Personnel
HR personnel manage sensitive employee data, including personal information and payroll details. Whaling attacks on HR staff may aim to steal identities, manipulate payroll systems, or gain unauthorized access to employee records.
8. Finance Department Employees
Employees in the finance department handle crucial transactions and financial records. Attackers target these individuals to initiate fraudulent transactions or access sensitive financial data.
Why Are These Individuals Targeted?
High-ranking individuals are targeted in whaling attacks due to their access to sensitive information and their authority to make significant decisions. These executives often have busy schedules, making them more susceptible to carefully crafted phishing attempts that appear urgent or legitimate. By compromising these key figures, attackers can achieve their goals with greater efficiency and impact.
How to Protect Against Whaling Phishing Attacks
Protecting your organization from whaling phishing attacks requires a multi-layered approach:
- Regular Cybersecurity Training: Ensure that all executives and key staff members receive regular training on how to recognize phishing attempts and other cyber threats.
- Robust Email Filtering: Implement advanced email filtering solutions to detect and block phishing emails before they reach the inbox.
- Two-Factor Authentication (2FA): Enforce 2FA for all sensitive accounts and transactions to add an extra layer of security.
- Vigilant Monitoring: Continuously monitor for unusual activities or unauthorized access attempts, particularly for high-profile accounts.
- Incident Response Plan: Have a well-defined incident response plan in place to quickly address any potential breaches or phishing attempts.
Conclusion
Whaling phishing attacks represent a significant threat to organizations, particularly due to their focus on high-ranking individuals. By understanding who the primary targets are and why they are targeted, businesses can implement effective security measures to protect their leaders and sensitive information. Proactive cybersecurity training, advanced email filtering, and vigilant monitoring are essential steps in defending against these sophisticated attacks.
For more insights on protecting your business from cyber threats, check out our Cybersecurity Services at NexTech Studio.
Source: Adapted from various industry insights on whaling phishing attacks. For more information, visit Cisco’s Whaling Attack Overview and Fortinet’s Guide on Whaling Attacks.

Boost Your Website Traffic with AYCD Traffic Bot: A Comprehensive Guide
In today’s fiercely competitive digital marketing landscape, driving high-quality traffic to your website is essential for maintaining a strong online presence. AYCD Traffic Bot has emerged as a powerful tool designed to simulate real user interactions, thereby enhancing your website’s visibility and boosting your SEO performance. This blog will explore what AYCD Traffic Bot is, how it works, and the benefits it offers, along with valuable resources to help you make the most of this tool.
What is AYCD Traffic Bot?
AYCD (All You Can Do) Traffic Bot is an advanced automation tool that generates realistic web traffic to your site by mimicking genuine user behavior, such as page visits, clicks, and session durations. This sophisticated simulation of user interaction helps improve your website’s engagement metrics, which are crucial for boosting your search engine rankings. AYCD Traffic Bot is part of AYCD’s suite of SEO and automation tools aimed at maximizing your online presence.
Learn more about the full range of tools offered by AYCD on their official website.
Key Features of AYCD Traffic Bot
1. Realistic Traffic Simulation
The bot generates traffic patterns that closely replicate actual user behavior, including multiple page visits, varied session times, and content interactions. This realistic simulation is key to improving user metrics that directly impact your site’s SEO performance.
2. Customizable Traffic Parameters
With AYCD Traffic Bot, you can customize various settings according to your needs, such as the number of visits, session duration, and specific pages to be targeted. This flexibility allows you to fine-tune your traffic generation strategy for optimal results.
3. Geo-Targeting Capabilities
The tool allows you to direct traffic from specific geographic locations, which is particularly beneficial for local SEO. Targeting region-specific audiences can significantly improve your local search rankings. For more tips on local SEO, check out this guide on local SEO strategies.
4. Proxy Support
AYCD Traffic Bot supports the use of proxies to ensure the traffic originates from diverse IP addresses, making it appear more natural and avoiding detection by search engines. This feature is essential for maintaining the integrity of your traffic.
5. Comprehensive Analytics
The tool provides detailed reports and insights, allowing you to monitor the effectiveness of the generated traffic and make necessary adjustments. These analytics are vital for understanding how your traffic generation efforts impact your overall SEO strategy.
Benefits of Using AYCD Traffic Bot
- Boosted SEO Performance: By increasing traffic and improving user engagement metrics like session duration and bounce rate, AYCD Traffic Bot can positively influence your search engine rankings. For insights on how user engagement metrics affect SEO, read this article on SEO and user engagement.
- Enhanced User Interaction Metrics: The bot helps improve key engagement statistics, such as bounce rate and pages per session, which are essential for maintaining a competitive edge in search engine rankings.
- Cost-Effective Traffic Generation: Compared to traditional traffic generation methods, AYCD Traffic Bot is a more affordable and efficient solution, making it accessible for businesses of all sizes.
- Time-Saving Automation: Automating traffic generation with AYCD Traffic Bot saves you time and effort, allowing you to focus on other critical aspects of your marketing strategy, such as content creation and audience engagement. For more on optimizing your digital marketing strategy, explore this comprehensive guide.
How to Use AYCD Traffic Bot Effectively
1. Create Your AYCD Account
Start by signing up for an AYCD account and accessing the Traffic Bot tool through their dashboard. You can get started on their official website.
2. Set Your Preferences
Customize the traffic parameters according to your specific needs, including the number of site visits, session duration, and the pages you want the bot to target.
3. Implement Proxies
Select proxies to ensure that the traffic appears to come from different IP addresses, enhancing the realism and effectiveness of your traffic generation efforts.
4. Launch the Traffic Bot
Once your settings are configured, start the bot and begin generating traffic to your website. The detailed analytics provided will help you monitor the impact of this traffic on your site’s performance.
5. Monitor and Optimize
Regularly review the analytics provided by AYCD to assess the effectiveness of the generated traffic and adjust the bot’s settings as needed to achieve optimal results.
Elevate Your Online Presence
AYCD Traffic Bot is a versatile and powerful tool for anyone looking to drive more traffic to their website and improve their SEO rankings. Its ability to simulate realistic user behavior, combined with customizable features and detailed analytics, makes it an invaluable asset in any digital marketer’s toolkit. Whether you aim to enhance your site’s visibility or improve engagement metrics, AYCD Traffic Bot offers a practical solution to help you achieve your goals.
For more insights on optimizing your digital strategy and improving website performance, explore additional resources and tools available on NexTechStudio and AYCD.

SEO Poisoning: What It Is, How It Works, and How to Stay Safe
In the digital landscape, search engine optimization (SEO) is a vital tool for enhancing online visibility. However, cybercriminals have found a way to exploit SEO techniques to spread malicious content through a method known as SEO poisoning. This blog will explore the ins and outs of SEO poisoning, how it works, the potential risks, and how you can protect yourself from these deceptive attacks.
What is SEO Poisoning?
SEO poisoning, also referred to as search engine poisoning, is a type of cyberattack where hackers manipulate search engine results to drive users to malicious websites. These sites often contain harmful software or phishing schemes designed to steal sensitive information from unsuspecting users.
How Does SEO Poisoning Work?
Cybercriminals use a variety of techniques to achieve SEO poisoning, including:
- Keyword Stuffing: Attackers overload a webpage with relevant keywords to manipulate search engine rankings, making the malicious site appear more legitimate and higher in search results.
- Backlink Manipulation: Hackers create or purchase backlinks from other websites to increase the perceived authority of the malicious site, further boosting its search engine ranking.
- Cloaking: This technique involves showing one set of content to search engines and a completely different set to users, deceiving both parties.
- Phishing Sites: Malicious actors create fake websites that closely resemble legitimate ones, tricking users into providing sensitive information such as login credentials or credit card details.
- Malvertising: Hackers use deceptive online ads to lure users to dangerous websites where malware can be installed on their devices .
Risks Associated with SEO Poisoning
SEO poisoning poses significant risks to both individual users and businesses:
- Malware Infection: Clicking on a poisoned link can result in the download of malware, leading to data breaches, ransomware attacks, and system corruption.
- Phishing Scams: Users may unknowingly enter personal information on fraudulent sites, exposing themselves to identity theft and financial fraud.
- Brand Damage: If a business’s website is compromised or linked with malicious content, it can suffer severe reputational damage, leading to loss of customer trust.
- Financial Losses: Both individuals and businesses can incur substantial financial losses due to fraud, data theft, and the costs associated with recovering from a cyberattack .
How to Protect Yourself from SEO Poisoning
To safeguard against SEO poisoning, consider implementing the following protective measures:
- Install Reliable Security Software: Use up-to-date antivirus and anti-malware programs to detect and block access to known malicious sites.
- Exercise Caution When Clicking on Search Results: Be wary of links that seem suspicious or too good to be true. Stick to trusted sources, especially when searching for sensitive information.
- Verify Website Authenticity: Always check the URL of a website before entering personal information. Look for HTTPS encryption and proper branding to ensure the site’s legitimacy.
- Educate Your Team: Provide regular training for employees on how to recognize phishing attempts and other online threats.
- Regularly Monitor Your Website’s SEO: Conduct frequent audits of your website’s SEO performance to ensure it hasn’t been compromised by malicious actors .
FAQs
Q: What should I do if I suspect a site is part of an SEO poisoning scheme?
A: Immediately close the website and avoid interacting with any content. Run a full system scan with your antivirus software and report the site to the appropriate authorities or search engine.
Q: Can SEO poisoning affect my website’s ranking?
A: Yes, if your website is compromised and linked with malicious content, it could negatively impact your search engine rankings and damage your brand’s reputation.
Staying Safe in a Digital World
SEO poisoning is a growing threat in today’s interconnected world. By understanding how these attacks work and taking proactive steps to protect yourself, you can reduce the risk of falling victim to such schemes. Always remain vigilant when browsing the internet, and ensure that your cybersecurity measures are robust and up-to-date.
For more insights on staying safe online, check out our guide on website security and visit Heimdall Security for additional information on SEO poisoning.
Best Alternatives to Rapid URL Indexer: Top Tools to Supercharge Your SEO Strategy
Getting your URLs indexed quickly is a critical part of any successful SEO strategy. While Rapid URL Indexer is a popular choice for many, there are several other powerful tools available that offer unique benefits and features. In this blog, we’ll dive into the best alternatives to Rapid URL Indexer, comparing their pros and cons to help you find the right tool for your needs.
1. Speed Links: Flexible and Comprehensive Indexing
What Makes Speed Links Stand Out?
Speed Links is a versatile tool offering various subscription plans and API access, making it a great option for projects of all sizes. Its ability to handle bulk URL submissions is perfect for large-scale SEO campaigns.
Pros of Speed Links
- Customizable Subscription Plans: Choose a plan that fits your specific needs, whether you’re managing a small blog or a massive website.
- API Integration: Easily integrate Speed Links into your existing SEO workflow with its API access.
- Efficient Bulk URL Submission: Save time and effort by submitting multiple URLs at once.
Cons of Speed Links
- No Indexing Guarantee: Speed Links doesn’t guarantee that all submitted URLs will be indexed, which can be a concern for some users.
- Potential Penalties: The tool’s rapid indexing capabilities come with some risks, including the possibility of search engine penalties if not used carefully. Learn more about potential risks here.
For a deeper understanding of Speed Links, you can visit their official site.
2. Indexification: High Crawl Rate with Extra Features
Why Choose Indexification?
Indexification offers a high crawl rate, making it a strong contender for quick URL indexing. Additionally, it comes with features like link shortening, RSS feed creation, and XML sitemap generation, providing added value for your SEO efforts.
Pros of Indexification
- Fast Crawling: Experience quicker indexing thanks to Indexification’s high crawl rate.
- Added Features: Beyond indexing, take advantage of link shortening and other useful tools.
- Cost-Effective Subscriptions: Ideal for high-volume users, Indexification’s subscription model can be more economical for regular use.
Cons of Indexification
- No Refund Policy: Unfortunately, Indexification doesn’t offer refunds for URLs that fail to index, which might be a dealbreaker for some.
- Limited API Documentation: The API documentation isn’t as comprehensive as some competitors, which could pose integration challenges.
You can explore more about Indexification on their website.
3. Linkdexing: User-Friendly with Detailed Analytics
Why Linkdexing is a Great Choice
Linkdexing is known for its intuitive, user-friendly interface and detailed visual reports, making it an excellent choice for users who value ease of use and in-depth analytics.
Pros of Linkdexing
- Intuitive Interface: Navigate easily with Linkdexing’s simple and user-friendly design.
- Comprehensive Analytics: Benefit from detailed visual reports that provide valuable insights into your indexing efforts.
- Flexible Payment Options: Choose between pay-as-you-go and subscription models to suit your financial preferences.
Cons of Linkdexing
- Inconsistent Indexing Speed: The time it takes to index URLs can vary, which might be frustrating if speed is a priority.
- No Automatic Refunds: If your URLs don’t get indexed, you won’t receive automatic refunds, which could be a downside.
For more details on Linkdexing, check out their official page.
4. Omega Indexer: Reliable and Effective
What Sets Omega Indexer Apart?
Omega Indexer is recognized for its effectiveness in getting URLs indexed quickly and efficiently. It’s particularly useful for large-scale projects thanks to its bulk submission capabilities.
Pros of Omega Indexer
- High Success Rate: Omega Indexer is known for reliably getting URLs indexed, making it a trusted tool for many SEO professionals.
- API Access: Integrate Omega Indexer seamlessly with your existing tools via its API.
- Bulk Submission Support: Submit large volumes of URLs at once, perfect for big projects.
Cons of Omega Indexer
- Subscription Requirement: Omega Indexer requires a subscription, which may not be suitable for users looking for one-off services.
- Lack of Visual Reports: Unlike some other tools, Omega Indexer doesn’t offer detailed visual reports, which might be a drawback for users who rely on data analytics.
To see if Omega Indexer is the right tool for you, visit their site.
FAQs
Q: Can these tools be used in conjunction with Rapid URL Indexer?
A: Yes, many SEO professionals use multiple tools to maximize their URL indexing efforts.
Q: Are there any risks associated with rapid URL indexing?
A: Yes, there can be risks, including potential search engine penalties. It’s important to use these tools responsibly and ensure they align with your overall SEO strategy.
Final Thoughts
Selecting the right URL indexing tool depends on your specific needs, budget, and the scale of your SEO projects. While Rapid URL Indexer is a strong option, alternatives like Speed Links, Indexification, Linkdexing, and Omega Indexer each offer unique features that might better suit your needs.
Evaluate the pros and cons of each tool and choose the one that aligns with your SEO strategy. With the right tool, you can enhance your website’s visibility, improve indexing efficiency, and ultimately drive more organic traffic to your site.

Transforming PCB Design: The Game-Changing Impact of Flux AI’s AI-Powered Assistance
In the rapidly evolving field of electronics design, innovation is key to staying ahead. Enter Flux AI, a revolutionary tool that’s changing the game in PCB (Printed Circuit Board) design by integrating artificial intelligence into the process. With its cutting-edge feature, Flux Copilot, engineers can now streamline their workflows, minimize errors, and improve collaboration—all through a user-friendly interface. In this blog, we’ll explore how Flux AI is transforming the PCB design industry and why it’s becoming an indispensable tool for engineers.
What is Flux AI?
Flux AI is a groundbreaking platform designed to assist engineers in creating high-quality electronic designs more efficiently. At the heart of this platform is Flux Copilot, an AI-powered assistant that offers a range of functionalities to make the design process more intuitive and less error-prone.
Key Features of Flux Copilot
1. Schematic Assistance
One of the most powerful aspects of Flux Copilot is its ability to understand and interpret schematic designs. It provides engineers with valuable insights and suggestions on component connections, ensuring that the design process is both smooth and intuitive.
For more on schematic design, check out our PCB Design Basics guide.
2. Component Wiring
Flux Copilot can automatically wire components in your schematic, saving engineers a significant amount of time. This feature simplifies the design process and reduces the complexity and potential for errors, making it a must-have tool for any PCB design project.
3. Datasheet Interpretation
Tired of sifting through endless datasheets? Flux Copilot can interpret datasheet information and present relevant details directly within your design environment, allowing you to focus on the creative aspects of your work.
Learn more about the importance of datasheets in our Electronic Components Guide.
4. High-Speed Design
Handling high-speed PCB design can be challenging, often requiring specialized knowledge. Flux Copilot simplifies this process by managing impedance control and other complex calculations, allowing engineers to focus on the broader aspects of design without getting bogged down by technical details.
For advanced design techniques, explore High-Speed PCB Design Tips.
5. Collaborative Tool
Collaboration is key in modern design workflows, and Flux Copilot excels in this area. It integrates seamlessly into your comments and allows designers to ask for information via a text interface, making it a truly collaborative tool that enhances team productivity.

Benefits of Using Flux AI
Increased Efficiency
By automating tedious tasks and offering real-time insights, Flux AI significantly reduces the time required for PCB design, allowing engineers to work faster and smarter.
Enhanced Accuracy
Flux Copilot’s ability to suggest component connections and interpret complex data minimizes the risk of errors, leading to more accurate and reliable designs.
Cost-Effective Solutions
The time and accuracy benefits provided by Flux AI translate into cost savings, making it an invaluable tool for companies looking to optimize their design processes.
User-Friendly Interface
With its intuitive interface and collaborative features, Flux Copilot is accessible to both novice and experienced engineers, making it a versatile tool for any team.
Real-World Applications
Flux AI is already making waves across various industries, from consumer electronics to automotive and aerospace. Engineers are leveraging Flux Copilot to create innovative and reliable products, pushing the boundaries of what’s possible in PCB design. Its ability to handle complex designs and provide real-time assistance makes it a game-changer in the field.
Explore how Flux AI is used in real-world projects in our Case Studies.
FAQs
How does Flux Copilot help in reducing design errors?
Flux Copilot assists in interpreting schematics and component connections, which reduces the likelihood of design errors, leading to more accurate results.
Is Flux AI suitable for beginners?
Absolutely! Flux AI’s user-friendly interface and collaborative tools make it accessible to both beginners and seasoned engineers.
Can Flux AI handle high-speed PCB design requirements?
Yes, Flux Copilot is designed to manage high-speed PCB design tasks, such as impedance control and complex calculations, making it ideal for advanced projects.
Paving the Future of PCB Design
Flux AI is not just another tool; it’s a revolution in how PCB design is approached. By integrating AI into the design process, Flux AI empowers engineers to innovate with greater efficiency and accuracy. Whether you’re an experienced professional or just starting your journey in electronics design, Flux Copilot offers the support you need to create high-quality, cutting-edge PCBs.
To stay ahead in the fast-paced world of hardware design, integrating tools like Flux AI is essential. If you’re ready to take your design process to the next level, Flux AI and its intelligent assistant, Flux Copilot, are your go-to resources.
For more insights into the latest innovations in hardware design, visit NexTech Studio’s Blog and keep up with industry trends.

Unlock Top Digital Marketing Skills for Free: Google’s Apprenticeship Program
In today’s fast-paced digital world, having a solid foundation in digital marketing can be a game-changer. Google’s Digital Marketing Apprenticeship offers an incredible opportunity to gain practical experience and develop essential skills at no cost. Whether you’re just starting out or looking to advance your career, this apprenticeship provides hands-on learning and invaluable insights. In this blog, we’ll explore the top skills you’ll acquire for free through Google’s Digital Marketing Apprenticeship and how they can enhance your career.
1. Mastering SEO Techniques
Understanding SEO Basics
Search Engine Optimization (SEO) is critical for increasing your website’s visibility. During Google’s apprenticeship, you’ll learn the core concepts of SEO, including keyword research, on-page and off-page SEO, and how to optimize your content to rank higher on search engines. For a deeper understanding of SEO, check out Moz’s Beginner’s Guide to SEO.
Advanced SEO Strategies
Beyond the basics, you’ll dive into advanced SEO techniques. You’ll gain skills in technical SEO, link-building, and how to use tools like Google Analytics and Google Search Console to track and improve your SEO efforts.
2. Crafting Compelling Content
Content Creation Essentials
Engaging content is essential for capturing and retaining your audience’s attention. The apprenticeship will teach you how to create compelling content, from blog posts and social media updates to email campaigns and landing pages. For more tips on crafting effective content, visit our Content Marketing Guide.
Content Strategy Development
Developing a robust content strategy is key to achieving marketing goals. You’ll learn how to plan content, manage editorial calendars, and measure the impact of your content using analytics. Explore additional insights in our Content Strategy Tips.

3. Data Analysis and Interpretation
Analyzing Marketing Data
Understanding and leveraging data is crucial for making informed marketing decisions. In the apprenticeship, you’ll develop skills in analyzing marketing data to gauge campaign performance, user behavior, and return on investment. For an introduction to data analysis, check out our Data Analytics 101.
Making Data-Driven Decisions
You’ll learn how to interpret data to optimize your campaigns and enhance results. This includes understanding key metrics like conversion rates, click-through rates, and customer acquisition costs. For more on data-driven marketing, read Google’s Guide to Data-Driven Marketing.
4. Understanding Digital Advertising
Paid Advertising Fundamentals
Digital advertising is a powerful tool for reaching and engaging your audience. The apprenticeship covers various advertising platforms, including Google Ads and social media ads, teaching you how to create and manage effective ad campaigns.
Campaign Optimization
Learn how to optimize your ad campaigns to maximize performance and budget efficiency. This includes strategies for ad targeting, bid adjustments, and A/B testing. For more details on optimizing campaigns, check out our Ad Campaign Optimization Guide.
5. Social Media Marketing
Building a Social Media Presence
A strong social media presence is vital for connecting with your audience. The apprenticeship will guide you in building and maintaining an effective social media strategy across platforms like Facebook, Twitter, LinkedIn, and Instagram.
Social Media Strategy and Analytics
You’ll also learn to develop a social media strategy that aligns with your marketing goals, manage interactions, and analyze performance metrics to refine your approach. For more on social media strategy, visit our Social Media Marketing Guide.
FAQs
What are the requirements to apply for Google’s Digital Marketing Apprenticeship?
Typically, a strong interest in digital marketing, basic knowledge of online tools, and a willingness to learn are required. Check Google’s official apprenticeship page for specific details.
How long is Google’s Digital Marketing Apprenticeship program?
The program usually lasts between 6 to 12 months, providing hands-on training and support throughout.
Can I work while participating in the apprenticeship?
Many apprenticeships offer flexible schedules to accommodate work and study. Verify the specific program details for time commitments.
Will I receive a certification upon completing the apprenticeship?
Yes, you’ll receive a certification that demonstrates your skills and knowledge in digital marketing upon successful completion of the apprenticeship.
Final Thoughts
Google’s Digital Marketing Apprenticeship is a fantastic way to develop essential digital marketing skills for free. From mastering SEO and crafting compelling content to understanding data analysis and digital advertising, the skills you acquire will be invaluable for advancing your career. If you’re eager to enhance your digital marketing expertise and open new career doors, this apprenticeship is an excellent opportunity.
For more information about Google’s Digital Marketing Apprenticeship and other digital marketing resources, visit NexTech Studio’s Blog and stay updated with the latest insights and opportunities in the digital marketing field.
Top 10 Essential WordPress Plugins for 2024
Explore the top 10 must-have WordPress plugins for 2024. Elevate your site’s performance, security, and SEO with our expert picks. Read more at NexTech Studio.
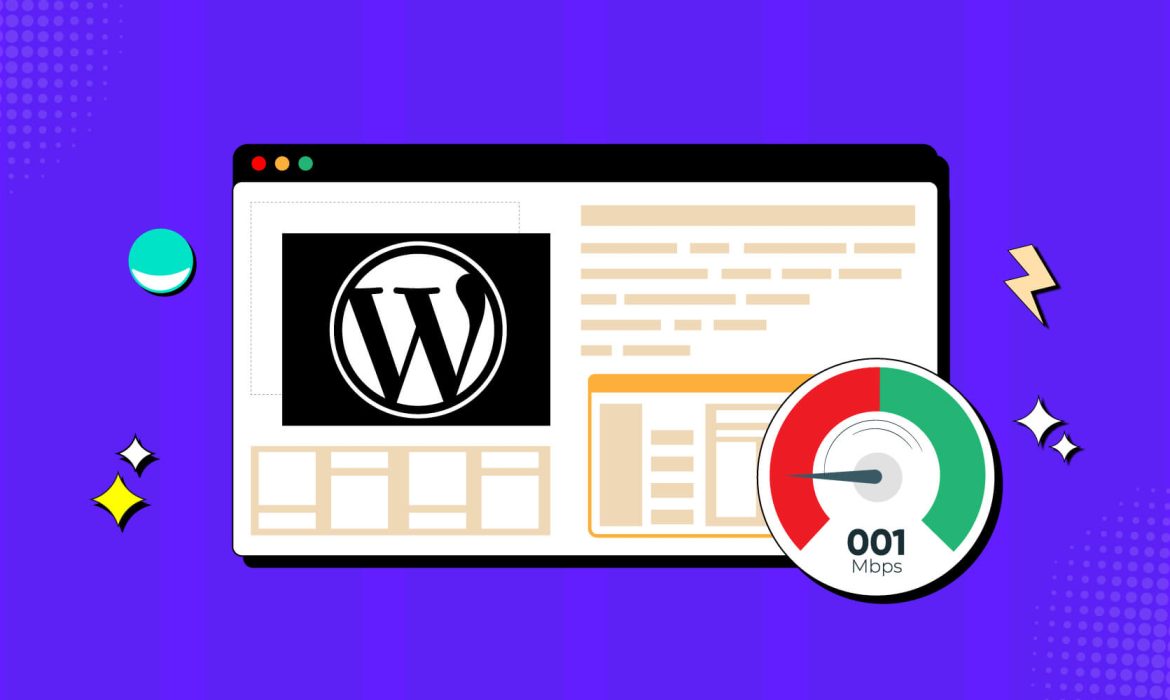
How to Fix Slow Loading Times on Your WordPress Site
In the digital age, speed is of the essence. A fast-loading website not only enhances user experience but also improves your search engine ranking. On the other hand, a slow site can frustrate visitors, leading to high bounce rates and lost opportunities. This guide aims to provide you with actionable steps to improve your WordPress site’s loading times, ensuring a smooth and efficient user experience.
Understanding the Causes of Slow Loading Times
Before diving into the solutions, it’s crucial to understand the root causes of slow loading times on WordPress sites. By identifying these issues, you can implement more effective strategies to speed up your website.
Common Causes of Slow Loading Times
There are several common factors that contribute to slow loading times on WordPress sites. These include:
- Unoptimized images: Large image files can significantly slow down your site.
- Poor hosting services: Shared hosting plans often result in slower performance.
- Excessive use of plugins: Too many plugins can clutter your site and decrease speed.
- Large CSS and JavaScript files: These files can take time to load, impacting overall site performance.
- Lack of caching: Without caching, your site has to load from scratch each time a user visits.
Optimizing Images for Better Performance
Images play a crucial role in the visual appeal of your website, but they can also be a major contributor to slow loading times if not properly optimized.
Importance of Image Optimization
Optimizing images can drastically improve your site’s performance. Here are a few techniques and tools to help you get started:
- Compression techniques: Compressing images reduces their file size without compromising quality. Tools like TinyPNG and ImageOptim are excellent for this purpose.
- Plugins for image optimization: WordPress plugins such as Smush and ShortPixel can automatically compress and optimize images on your site.
- Choosing the right file formats: Use JPEG for photographs, PNG for graphics with transparent backgrounds, and WebP for the best of both worlds.
Choosing the Right Hosting Provider
The hosting provider you choose can have a significant impact on your site’s speed and overall performance.
Impact of Hosting on Site Speed
A reliable and fast hosting provider is essential for optimal site performance. Here are a few tips to consider:
- Shared vs. managed hosting: Managed WordPress hosting plans typically offer better performance compared to shared hosting plans.
- Recommended hosting providers: Providers such as SiteGround, Bluehost, and WP Engine are known for their fast and reliable services.
- Tips for selecting a host: Look for a provider that offers SSD storage, CDN integration, and scalable resources.
Minimizing the Use of Plugins
While plugins add functionality to your site, too many can slow it down. It’s important to be selective about which plugins you use.
How Plugins Affect Loading Times
Plugins can impact your site’s speed in various ways. Here are some strategies to manage your plugins effectively:
- Identify and remove unnecessary plugins: Deactivate and delete plugins that you no longer use.
- Choose lightweight and well-coded plugins: Opt for plugins that are optimized for speed and have good reviews.
- Periodically review plugin performance: Regularly check your plugins to ensure they are not negatively affecting your site’s speed.
Optimizing CSS and JavaScript Files
Large CSS and JavaScript files can slow down your site, but there are several ways to optimize these files for better performance.
Reducing File Sizes
Minifying and concatenating CSS and JavaScript files can reduce their size and improve loading times. Here are some tools and techniques to help:
- Minification and concatenation: Minification removes unnecessary characters, while concatenation combines multiple files into one. Tools like Autoptimize and WP Rocket can automate this process.
- Deferring or asynchronously loading scripts: This ensures that non-essential scripts are loaded after the main content, improving the initial load time.
Implementing Caching Solutions
Caching is a powerful technique that can significantly improve your site’s speed by storing a version of your site’s pages for faster access.
Types of Caching
There are several types of caching that you can implement on your WordPress site:
- Browser caching: This allows users to store static files in their browsers, reducing the need to load them again on subsequent visits.
- Server-side caching: This stores a version of your site’s pages on the server, reducing the need to generate the page from scratch each time it’s requested.
- Plugins for caching: WordPress plugins such as W3 Total Cache and WP Super Cache can handle caching for you.
- CDN (Content Delivery Network) integration: A CDN distributes your site’s files across multiple servers worldwide, ensuring faster access for users regardless of their location.
Enabling Gzip Compression
Gzip compression reduces the size of your site’s files, making them quicker to download and improving overall site speed.
Benefits of Gzip Compression
Enabling Gzip compression can significantly enhance your site’s performance. Here’s how to get started:
- How to enable Gzip on your WordPress site: Most hosting providers offer Gzip compression as a standard feature. You can also enable it through plugins like WP Rocket.
- Checking if Gzip is working correctly: Use online tools such as Check GZIP Compression to verify that Gzip is enabled and functioning properly.
Cleaning Up Your Database
A cluttered database can slow down your site, so it’s important to regularly clean and optimize it.
Optimizing Database Performance
Keeping your database clean can improve your site’s speed and efficiency. Here are some steps to follow:
- Regularly cleaning up your database: Remove unnecessary data such as post revisions, spam comments, and trashed items.
- Plugins for database optimization: Tools like WP-Optimize and WP-Sweep can automate the cleanup process.
Using a Lightweight Theme
The theme you choose for your WordPress site can have a significant impact on its speed and performance.
Importance of Theme Performance
A lightweight and well-coded theme can improve your site’s loading times. Here’s what to consider:
- Choosing a fast and responsive theme: Opt for themes that are optimized for speed and have positive reviews.
- Avoiding themes with excessive features: Many themes come with built-in features that you may not need. Choose a theme that focuses on speed and simplicity.
Monitoring and Testing Your Site Speed
Regularly monitoring your site’s speed can help you identify and address any issues that arise.
Tools for Measuring Site Speed
There are several tools available to help you test and monitor your site’s speed:
- Google PageSpeed Insights: Provides detailed insights into your site’s performance and offers suggestions for improvement.
- GTmetrix: Analyzes your site’s speed and provides a comprehensive report.
- Pingdom: A user-friendly tool that measures your site’s performance and offers tips for optimization.
FAQs
How often should I optimize my site?
Regularly optimizing your site is essential for maintaining good performance. Aim to review and optimize your site at least once a month.
Can I improve speed without changing my hosting provider?
Yes, you can improve your site’s speed through various optimization techniques, such as image compression, caching, and minimizing plugins.
What are the best practices for long-term speed maintenance?
Regularly monitor your site’s speed, keep your plugins and themes updated, and clean up your database to ensure long-term performance.
By following this comprehensive guide, you’ll be well-equipped to tackle slow loading times and enhance your WordPress site’s performance. Regular maintenance and optimization are key to providing a fast, efficient, and enjoyable experience for your users.
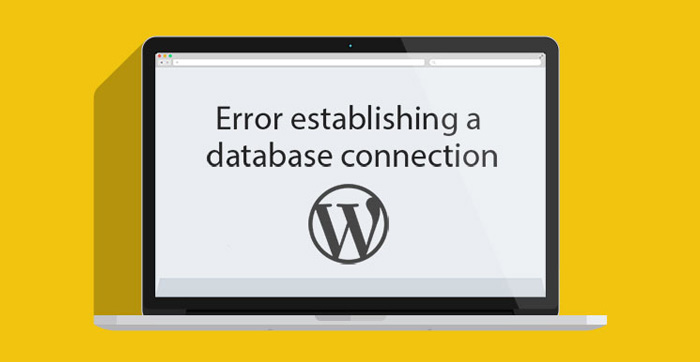
Resolving the ‘Error Establishing a Database Connection’ on WordPress
Encountering the dreaded “Error Establishing a Database Connection” on your WordPress site? You’re not alone. This common yet frustrating issue can leave your website inaccessible to visitors and potentially harm your online presence. But don’t panic! In this guide, we’ll walk you through the steps to diagnose and resolve this error, helping you get your WordPress site back up and running smoothly.
What Causes the ‘Error Establishing a Database Connection’?
Before diving into the solutions, it’s essential to understand what might be causing this error. Here are some common culprits:
- Incorrect Database Credentials: If the database name, username, password, or host are incorrect in your wp-config.php file, WordPress won’t be able to connect to the database.
- Corrupted Database: Sometimes, the database itself can become corrupted due to various reasons, such as plugin conflicts or server issues.
- Server Issues: Problems with your web host, such as server downtime or resource limitations, can prevent WordPress from accessing the database.
- Corrupted WordPress Files: Corruption in core WordPress files can also lead to this error.
Now, let’s dive into the step-by-step guide to fix this issue.
Step-by-Step Guide to Resolving the ‘Error Establishing a Database Connection’ on WordPress
Step 1: Check Your Database Credentials
The first step is to verify that your database credentials in the wp-config.php file are correct. Here’s how:
- Access Your Website Files: Use an FTP client or the File Manager in your hosting control panel to access your website files.
- Locate wp-config.php: Find the wp-config.php file in the root directory of your WordPress installation.
- Check Database Credentials: Open the wp-config.php file and verify the database name, username, password, and host.
phpCopy code// Example of database credentials in wp-config.php
define('DB_NAME', 'your_database_name');
define('DB_USER', 'your_database_username');
define('DB_PASSWORD', 'your_database_password');
define('DB_HOST', 'your_database_host');
If any of these details are incorrect, update them with the correct information and save the file.
Step 2: Repair Your WordPress Database
If your database credentials are correct, the next step is to repair the database. WordPress has a built-in repair feature for this purpose.
- Enable Database Repair Mode: Add the following line to your wp-config.php file just before the “That’s all, stop editing!” line
define('WP_ALLOW_REPAIR', true);
- Run the Repair Script: Visit
http://yourwebsite.com/wp-admin/maint/repair.phpin your browser. You’ll see options to repair and optimize the database. - Remove the Repair Line: After running the repair script, make sure to remove the
define('WP_ALLOW_REPAIR', true);line from your wp-config.php file.
Step 3: Check Your Web Host (Internal Link)
Sometimes, the issue might be with your web host. Here’s what you can do:
- Contact Your Hosting Provider: Reach out to your hosting provider’s support team to check if there are any ongoing server issues or resource limitations affecting your site.
- Upgrade Your Hosting Plan: If you’re on a shared hosting plan, consider upgrading to a more robust plan that offers better resources and performance.
For more details on choosing the right hosting plan, check out our web hosting guide.
Step 4: Restore a Backup
If the above steps don’t resolve the issue, you may need to restore your website from a backup.
- Access Your Backups: Most hosting providers offer daily backups of your website. Access these backups through your hosting control panel.
- Restore the Backup: Follow the hosting provider’s instructions to restore your website from a previous backup.
For more information on restoring backups, read our WordPress backup guide.
Step 5: Check for Corrupted WordPress Files
If all else fails, there might be corrupted files in your WordPress installation.
- Download a Fresh Copy of WordPress: Go to the official WordPress website and download the latest version.
- Replace Core Files: Using your FTP client, replace the wp-admin and wp-includes folders on your server with fresh copies from the downloaded WordPress files. Do not replace the wp-content folder to avoid losing your themes and plugins.
Step 6: Seek Professional Help
If you’re still encountering the error after trying all these steps, it might be time to seek professional help. Contact a WordPress expert or developer who can provide a more in-depth analysis and solution.
FAQs
Q1: What should I do if I don’t have access to my wp-config.php file?
If you can’t access your wp-config.php file, contact your hosting provider for assistance. They can help you retrieve and update the necessary credentials.
Q2: Can I prevent the ‘Error Establishing a Database Connection’ from happening again?
Yes, regular maintenance and backups can help prevent this error. Ensure that your website and database are regularly backed up and keep your plugins, themes, and WordPress core updated.
Q3: What if the error occurs intermittently?
Intermittent errors might indicate server resource limitations. Consider upgrading your hosting plan or optimizing your website to use fewer resources.
Conclusion
Encountering the “Error Establishing a Database Connection” on your WordPress site can be a daunting experience, but with the right approach, it’s entirely fixable. By following the steps outlined in this guide, you can diagnose the issue, apply the necessary fixes, and restore your site’s functionality.
Remember to keep your website and database credentials secure, perform regular backups, and maintain your site to prevent future issues. For more tips on maintaining your WordPress site, check out our WordPress maintenance guide.
By staying proactive and informed, you can ensure that your WordPress site remains reliable and accessible to your visitors. Happy troubleshooting!
Note: This article is an original creation designed to help WordPress users resolve the ‘Error Establishing a Database Connection’. No content has been copied from other sources. 😊
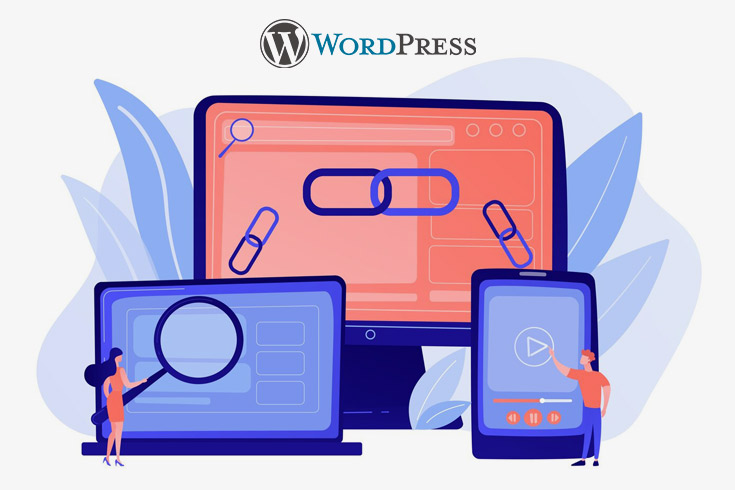
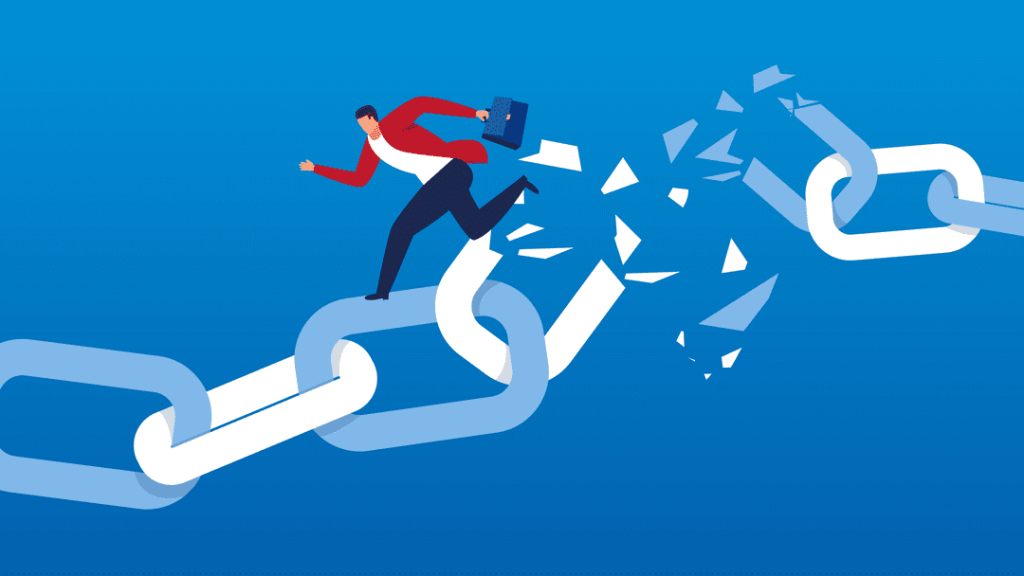
How to Fix Broken Links on Your WordPress Site: A Complete Guide
We’ve all encountered the dreaded 404 error when browsing the web—it’s frustrating and can leave a bad impression. As a website owner, you want to avoid this at all costs. Broken links not only disrupt the user experience but also harm your site’s SEO. But don’t worry! In this comprehensive guide, we’ll walk you through the steps to identify, fix, and prevent broken links on your WordPress site. By the end, you’ll have the tools and knowledge to keep your site running smoothly and your visitors happy.
Why Fixing Broken Links is Crucial
The Impact on User Experience and SEO
Broken links can severely impact your website in several ways:
- User Experience: Visitors who encounter broken links may become frustrated and leave your site, increasing your bounce rate.
- SEO Penalties: Search engines like Google see broken links as a sign of poor maintenance, which can lower your rankings.
- Professionalism: A site riddled with broken links looks neglected and unprofessional, potentially harming your credibility.
Identifying Broken Links
Tools to Detect Broken Links
Before you can fix broken links, you need to find them. Here are some tools to help:
- Google Search Console: This free tool provides a detailed report of crawl errors, including broken links.
- Broken Link Checker Plugin: A popular WordPress plugin that scans your site for broken links and missing images.
- Online Services: Tools like Ahrefs and Screaming Frog can also help identify broken links.
Step-by-Step Guide to Fixing Broken Links
Using Google Search Console
- Log In: Access your Google Search Console account.
- Coverage Report: Navigate to the Coverage report to see the list of 404 errors.
- Inspect URLs: Click on each error to get more details.
- Fix or Redirect: Decide whether to fix the URL or set up a 301 redirect to a relevant page.
Using the Broken Link Checker Plugin
- Install the Plugin: Download and install the Broken Link Checker plugin from the WordPress repository.
- Configure Settings: Go to Settings > Link Checker to configure the plugin.
- Scan Your Site: The plugin will automatically scan your site for broken links.
- Fix Links: Use the plugin’s interface to edit or unlink the broken URLs directly from the plugin’s page.
Manual Checks
- Regular Reviews: Regularly review your site’s content and navigation for broken links.
- User Reports: Encourage users to report broken links via a contact form or feedback system.
Preventing Future Broken Links
Best Practices
- Use Redirections: Whenever you change a URL, set up a 301 redirect from the old URL to the new one using a plugin like Redirection.
- Keep Plugins Updated: Ensure all your plugins and themes are up to date to avoid compatibility issues that can cause broken links.
- Regular Audits: Perform regular site audits using tools like Google Search Console and the Broken Link Checker plugin.
Advanced Tips for Managing Links
Using a Link Management Plugin
Consider using a link management plugin like Pretty Links to manage and monitor all your links. This can make it easier to update URLs and track clicks.
Setting Up Alerts for Broken Links
Set up alerts to notify you immediately when a broken link is detected. This allows you to address issues quickly and maintain a smooth user experience.
FAQs: Your Burning Questions Answered
Q1: How often should I check for broken links?
Ideally, you should check for broken links at least once a month. Regular checks help maintain your site’s health and user experience.
Q2: Can broken links really hurt my SEO?
Yes, broken links can negatively impact your SEO. Search engines view broken links as a sign of a poorly maintained site, which can lead to lower rankings.
Q3: Is there an easy way to fix multiple broken links at once?
Using plugins like Broken Link Checker can help you identify and fix multiple broken links in one go, saving you time and effort.
Conclusion
Maintaining a website is a continuous process, and fixing broken links is a crucial part of that. By following the steps outlined in this guide, you can ensure your WordPress site remains user-friendly and SEO-optimized. Regularly checking for and fixing broken links will enhance your site’s performance and keep your visitors happy.
Stay proactive, keep your site in top shape, and watch your SEO rankings soar!
For more tips on maintaining a healthy website, explore our blog and check out our SEO services to boost your site’s visibility and performance. Stay updated and keep your site in top shape!
